What’s Here
-
What You’ll Need
-
Lighting
-
Angles & Positioning
Taking pictures of watches is easily one of my favourite hobbies. A mechanical watch can be beautiful, and with the right eye (and gear), you can capture some incredible images. In this post I am going to run through how I take photos of skeleton watches. By the time you’re done reading this post you should be able to snap a mighty fine photo of your favourite mechanical marvel.
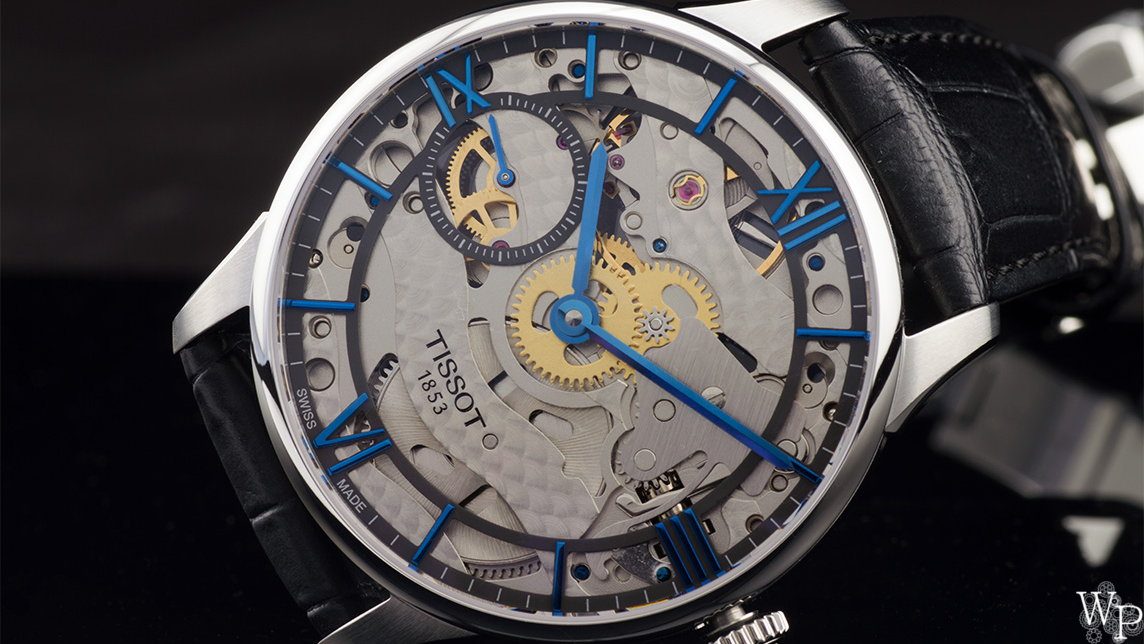
Posing for us today is a gorgeous mechanical Tissot Chemin Des Tourelles Squelette (loaned to us by the fine folks at Gem by Carati) as well as the affordable (and naked) automatic Swatch Irony Body & Soul.
Skeleton watches can be tricky to photograph because there’s a lot of different colours, textures, and depths. There are also more reflective surfaces, which makes lighting a bit more difficult to get right. It makes capturing a great image that much more rewarding.
Watches Featured in This Post
Tissot Chemin Des Tourelles Squelette
Here
Model
T099.405.16.418.00
Diameter
42mm
Movement
Mechanical, ETA 6497-1
Power Reserve
46 hours
Complications
Small seconds
Crystal
Sapphire
Water Resistance
50m / 165ft
Swatch Irony Body & Soul
Here
Model
YAS100G
Diameter
38mm
Movement
Automatic, ETA 2841
Power Reserve
48 hours
Complications
None
Crystal
Mineral
Water Resistance
30m / 99ft
Obligatory Disclaimer
I’m a huge watch guy and absolutely love taking photos of watches. However, I’m not a professional and am really more of a glorified geek with a camera.
Camera Gear & Accessories You’ll Need
Product photography is more complicated than you’d think, especially when shooting macro shots on reflective surfaces. I follow a methodical approach and like to take advantage of a few pieces of gear (in addition to my DSLR): a solid tripod, a light tent (for diffusing light and managing reflections), and a polarizing filter.
Camera Equipment
- DSLR camera. It doesn’t need to be high end – I shoot with a Nikon D3200 – but you do need to able to shoot in manual mode.
- A tripod. It is essential your camera remains still.
- A remote trigger. When you press the shutter button it shakes the camera slightly- any vibration will ruin your shot.
- Polarizing filter. This makes handling glare much easier.
Lighting & Reflection Management
- A light tent, light box, or other space you can diffuse lighting and control reflections.
- Your lights. I shoot using a three-light setup (left/right/top), but you don’t need to. As long as the light source is consistent, you’re good (desk lamp, window, etc.)
- A few blocks of white Styrofoam (ideally 6″ tall and 8-10″ wide, and thick enough that it can freestand easily).
It’s also handy to have surfaces and backdrops to take your photos on. Once you get your shot dialed in, you can control reflections in the case of the watch.
I like to use acrylic surfaces. I find that a matte white acrylic surfaceis a good way to control reflections and lighting, and a gloss black acrylic surface creates a nice reflection.
Back to What’s Here
Lighting
There are a lot of ways you can arrange your lighting. Keep in mind that the type of shot you’re wanting is going to more or less dictate how you set up your lighting. Lifestyle shots require that more than just the watch is lit, whereas macro photography only requires the part of the watch you’re shooting to be lit.
We’re shooting macro, meaning that we need to focus our lighting on the specific section of the watch we want to display. I get consistently good shots from this setup:
- 32″x32″ light tent
- Lighting on both sides as well as on top
- Side lights are Amazon-generic 3-stage lights that have five 45W 5500K bulbs
- Top light is an Amazon-generic 1-stage light with a 45W 5500K bulb
- About 12″ – 32″ of distance from the camera to the watch
- White and black material used to manage reflections – The type of fabric used is less relevant than its pattern: make sure that its neutral and without design. It should be a solid colour.
Direct light on a watch case and dial will be harsh and create glare. Your lighting must be diffused!
Start With Continuous Lighting
When controlling your light sources, there are two types: continuous lighting and flash lighting.
Many professionals use flashes as their light sources. However, for a new photographer, flashes can be tricky to learn on. I prefer to use continuous lighting because its more predictable, visual, and easier to learn with.
Continuous light setups are also affordable- the setup I use cost less than $150 and has been a great performer for me.
Lighting Tips
Lighting works the best when it is diffused (hence the light tent).
Using a ring light works for watches with a mat finish or for the strap/bracelet, but will create glare in the crystal or a steel polished case.
I prefer having not enough light vs too much. It’s a lot easier to use photoshop to brighten an image than it is to get rid of glare.
Having lights that allow you to adjust their brightness will make your life easier, but it’s not required (we can adjust camera settings to compensate). My side lights are three-stage, so I can run 1, 3, or all 5 bulbs in each light.
Setting Up Your “Studio”
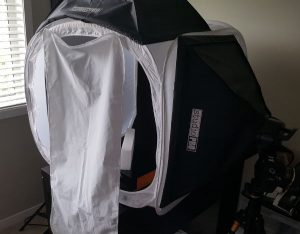 You don’t need to have a high-end setup in order to get a good shot; any setup that allows you to control/diffuse light will work.
However, investing $150 or so into a cheap lighting/light box setup pays off big. Something like this lighting setup ($120) and this light tent ($28) is all you need.
Pick a location where other sources of light can be controlled. Mixing light sources will throw off your white balance and make your photos look weird. I shoot in my home office with the blinds closed (and computer monitors turned off).
Back to What’s Here
Angles & Positioning
Taking a great photo of a watch requires an aesthetically pleasing angle. This is especially true of a skeleton watch, which usually have additional opportunities for storytelling within your photo by virtue of how their movements are on display. A skeleton watch presents a wonderful opportunity to get up close with the inner-workings of a timepiece.
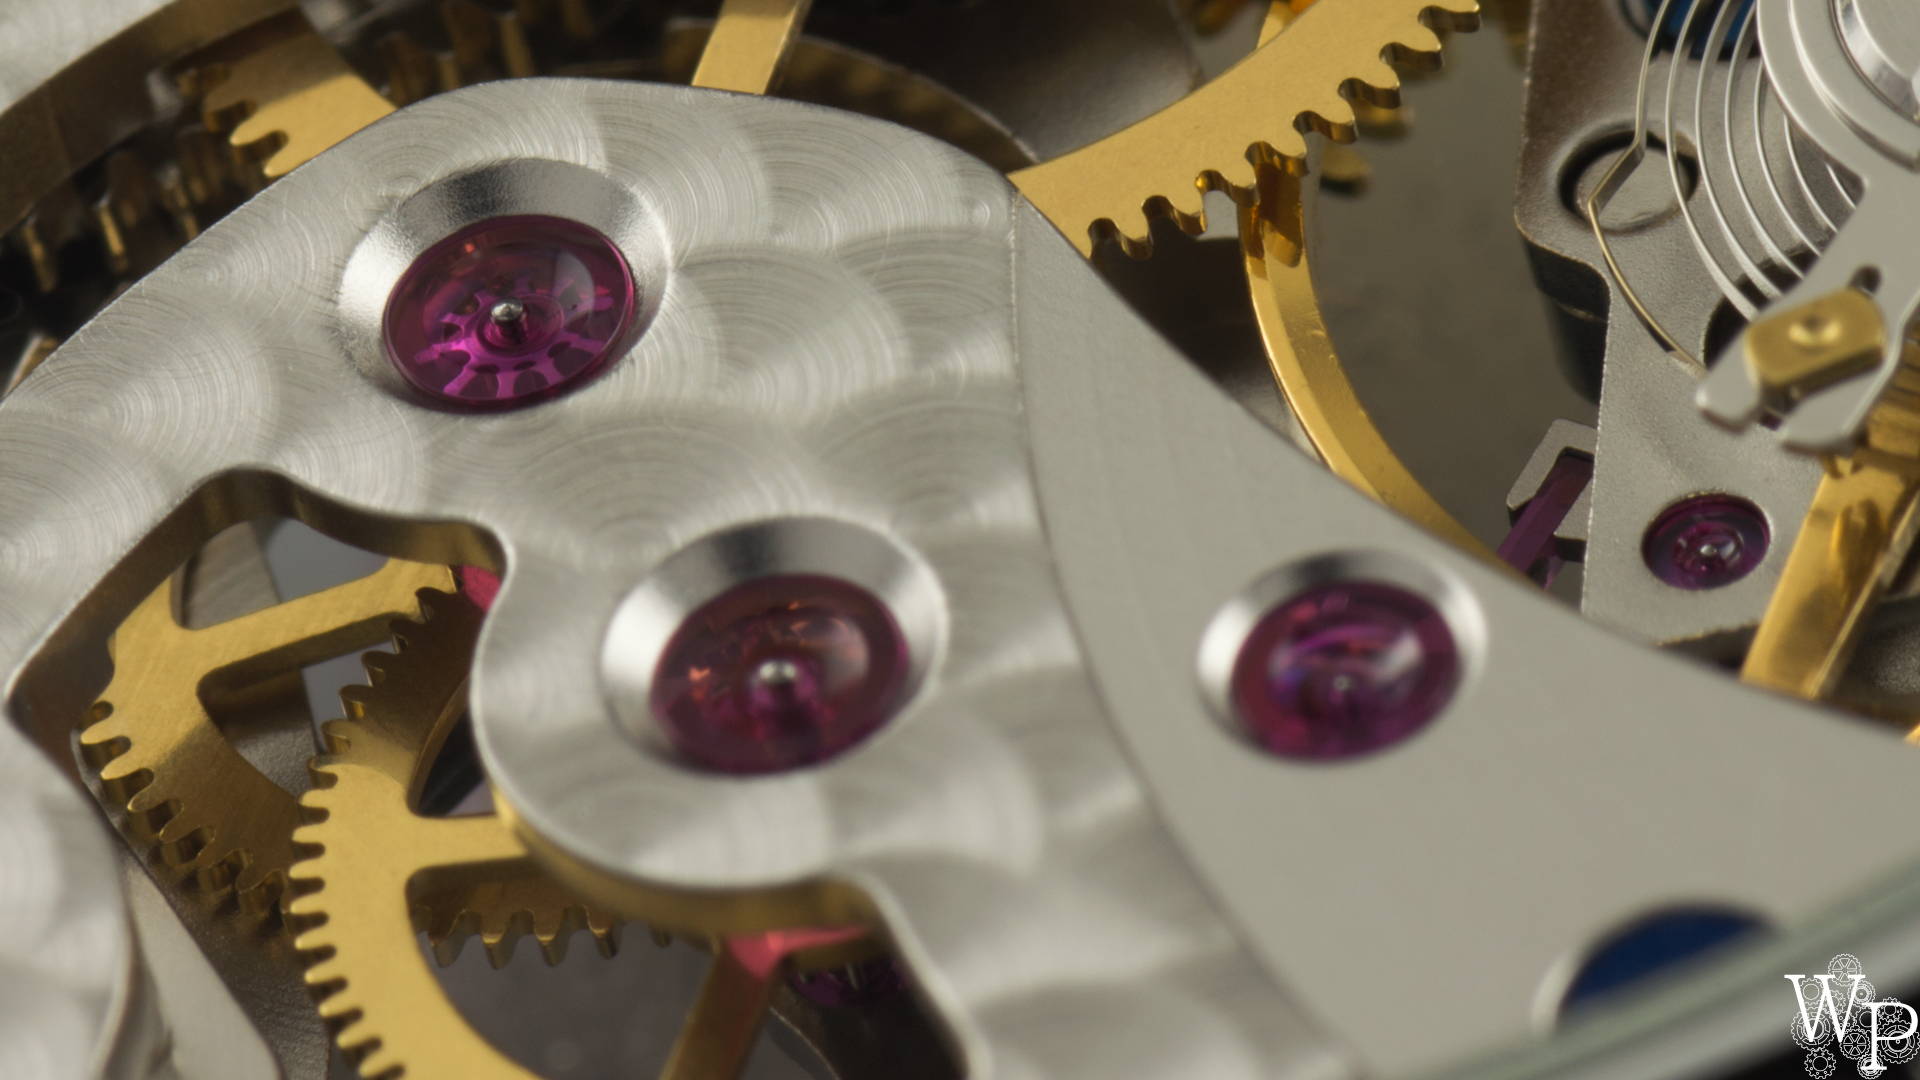
With the right shot, what you can’t see with your naked eye will become captivating once you view it up close. Take this photo of the ETA 6497-1 in the Tissot Chemin Des Tourelles Squelette, for example:
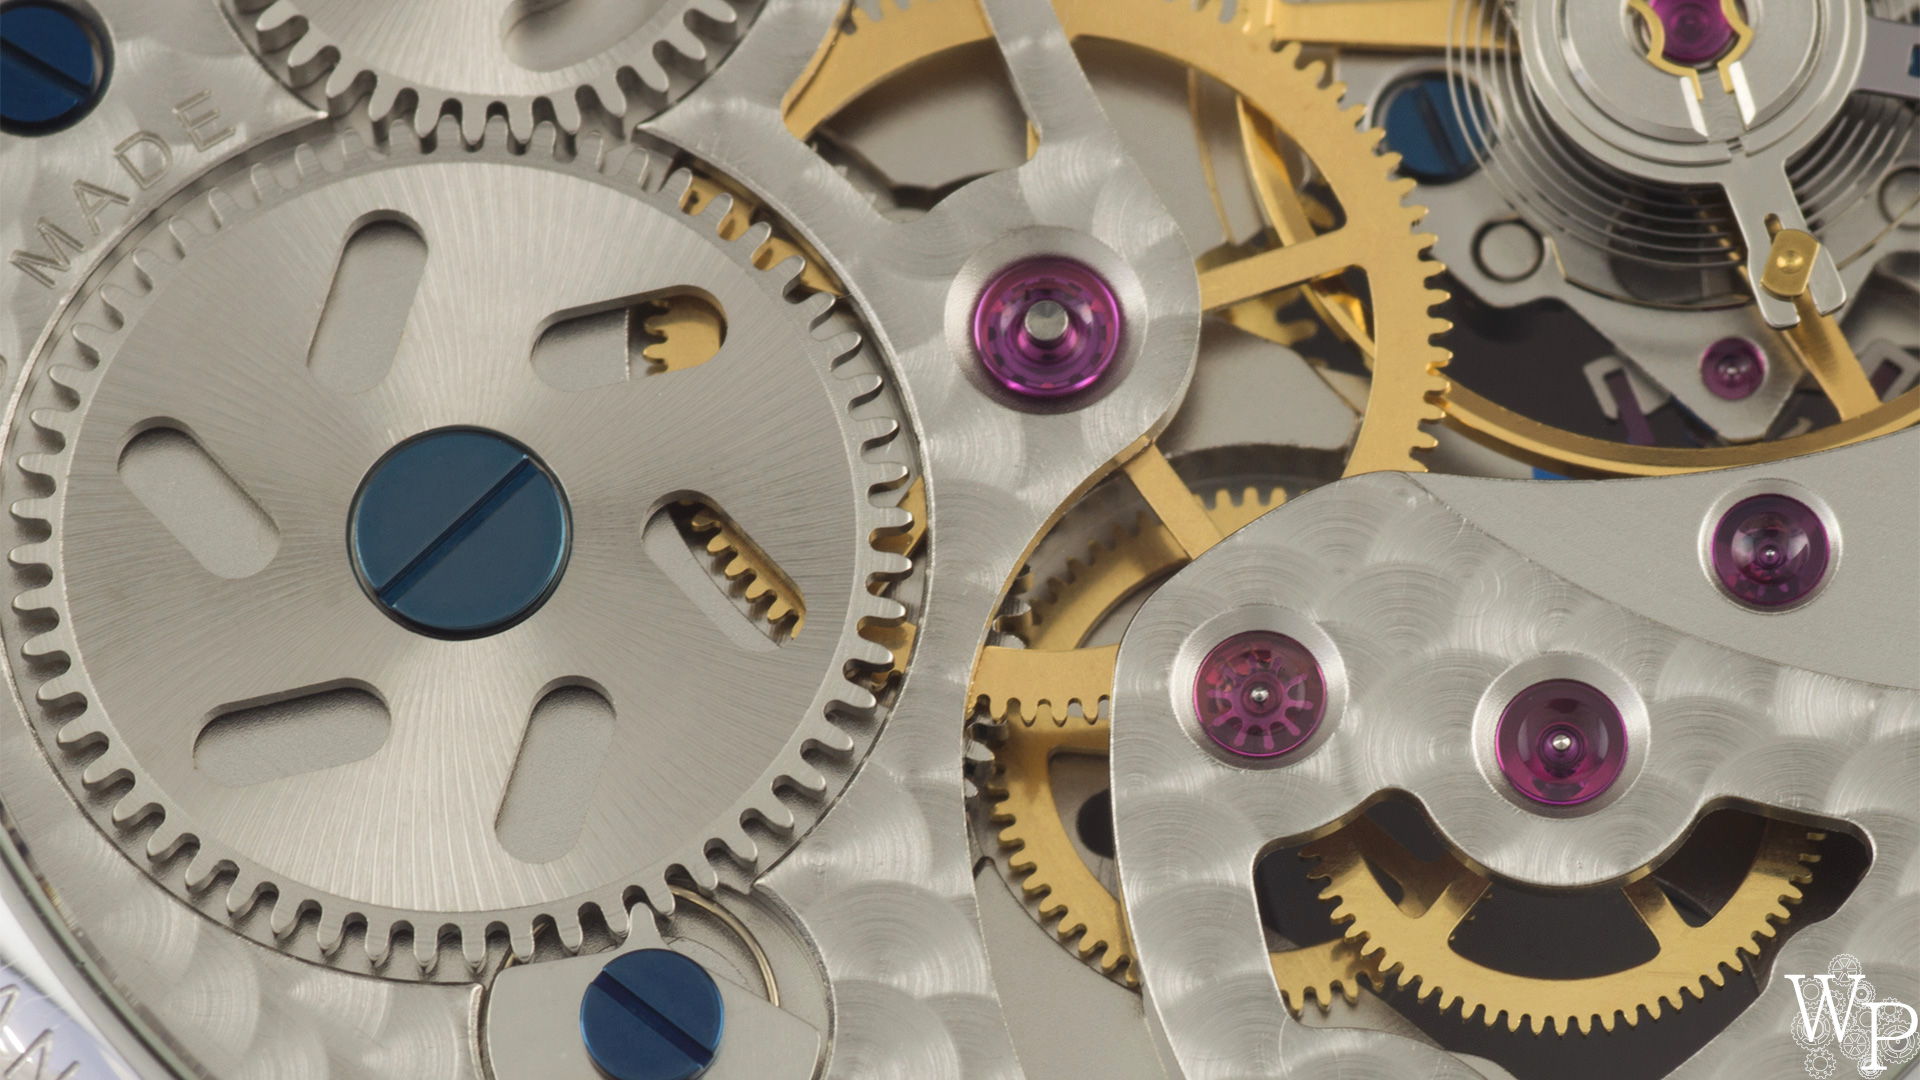 Visible in this shot are things the unaided eye could never see: the pinions underneath the rubies, the intricate mesh-work of the gears, the precision of the machining. Incredible.
Bringing Depth to a Mechanical Movement
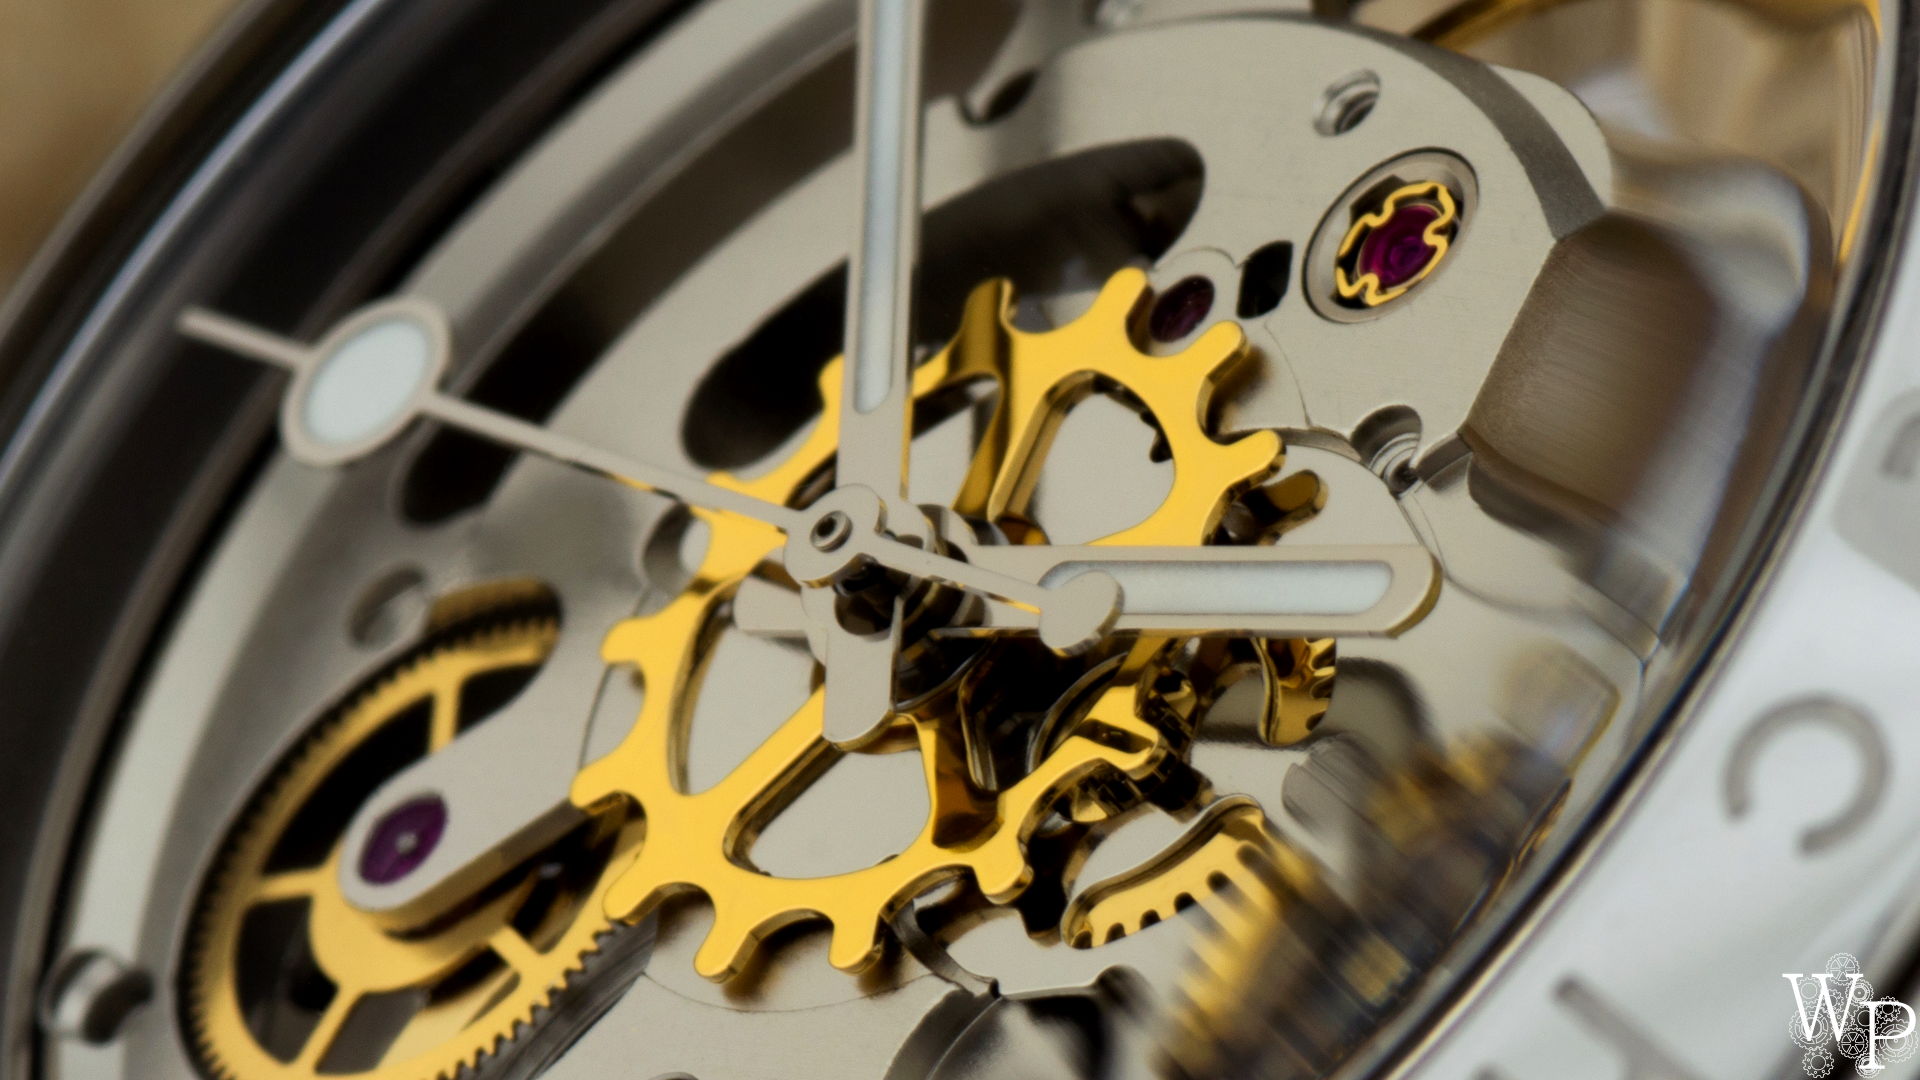
Don’t be afraid to frame your shot. All it takes as a new angle or perspective to turn a good shot into a great view. For me, shooting a mechanical with a 90mm macro lens is some of the most fun I have with my camera. Here’s a different take on the same watch/movement as the last photo:
An incredible story is told in this photo in an arguably more interesting way than the top-down shot. The introduction of the angle shifts perspective, and now the viewer can really see and appreciate the layers within the movement and the depth it represents.
Consider How You Want to Present Your Shot
Before I start shooting I like to check out the watch from a bunch of different perspectives, looking for cool scenes that I know would be visually interesting when presented blown-up.
Thanks to your tripod and light tent, you’re afforded the ability to control how a scene will be lit and the angle that you’ll shoot it from. This gives you a lot of options when choosing how you want to present your shot.
Consider the shot below, which is a variation of the two photos of the ETA 6497-1 movement shown in the earlier photos:
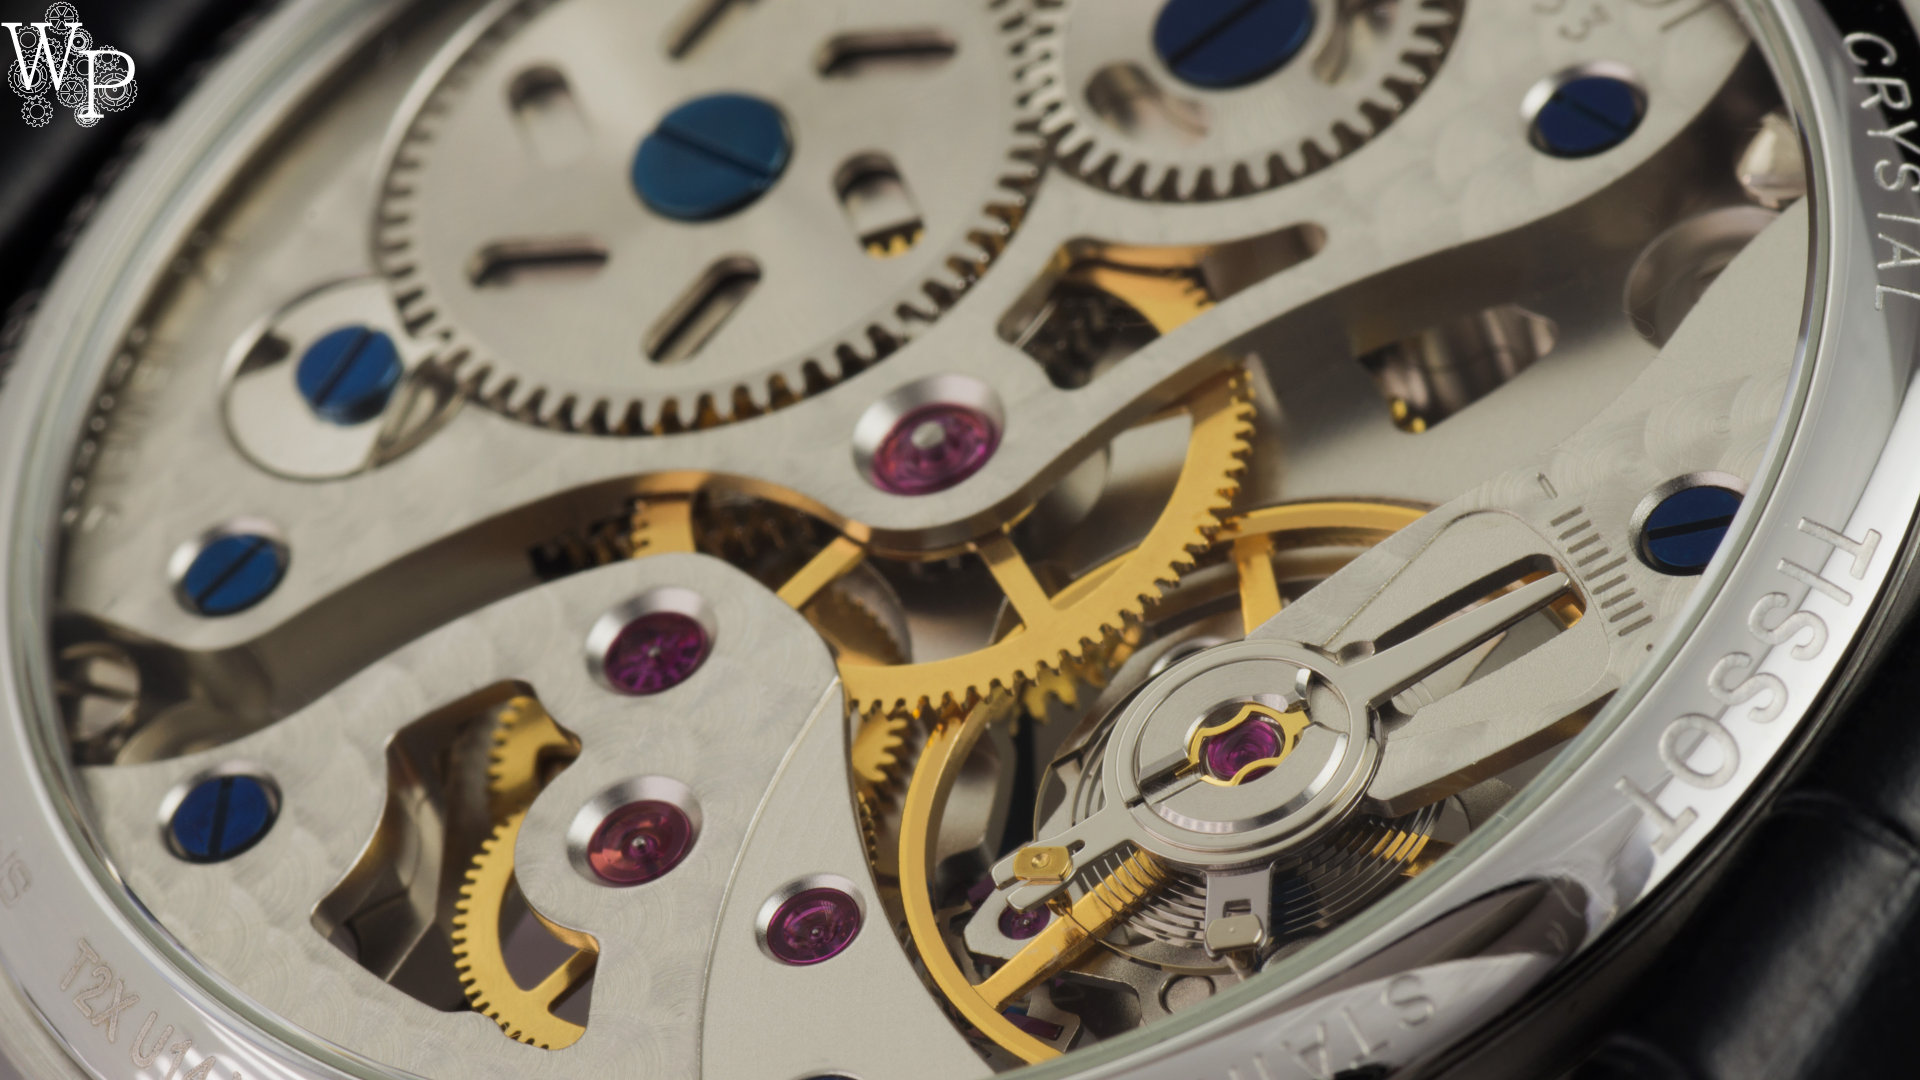 Since the upper third of the movement is blurred, your eye is naturally drawn toward the gears, balance wheel, and tuning fork. In my opinion, this shot is interesting but not as intimate as the other shots that are more zoomed in on individual components.
How a Dial Looks & Feels is Heavily Influenced by the Angle of the Shot
Even on a skeleton watch, the movement is flat compared to the dial. The hands and hour markers, by virtue of what they are, bring a visual focalpoint and certain depth that the movement lacks. Angles really matter here, especially when hands and indices are reflective.
Other elements need to be considered as well. On the Chemin Des Tourelles Squelette, the hands are a reflective blue- a slight change in angle can change how the hands look considerably. For example:
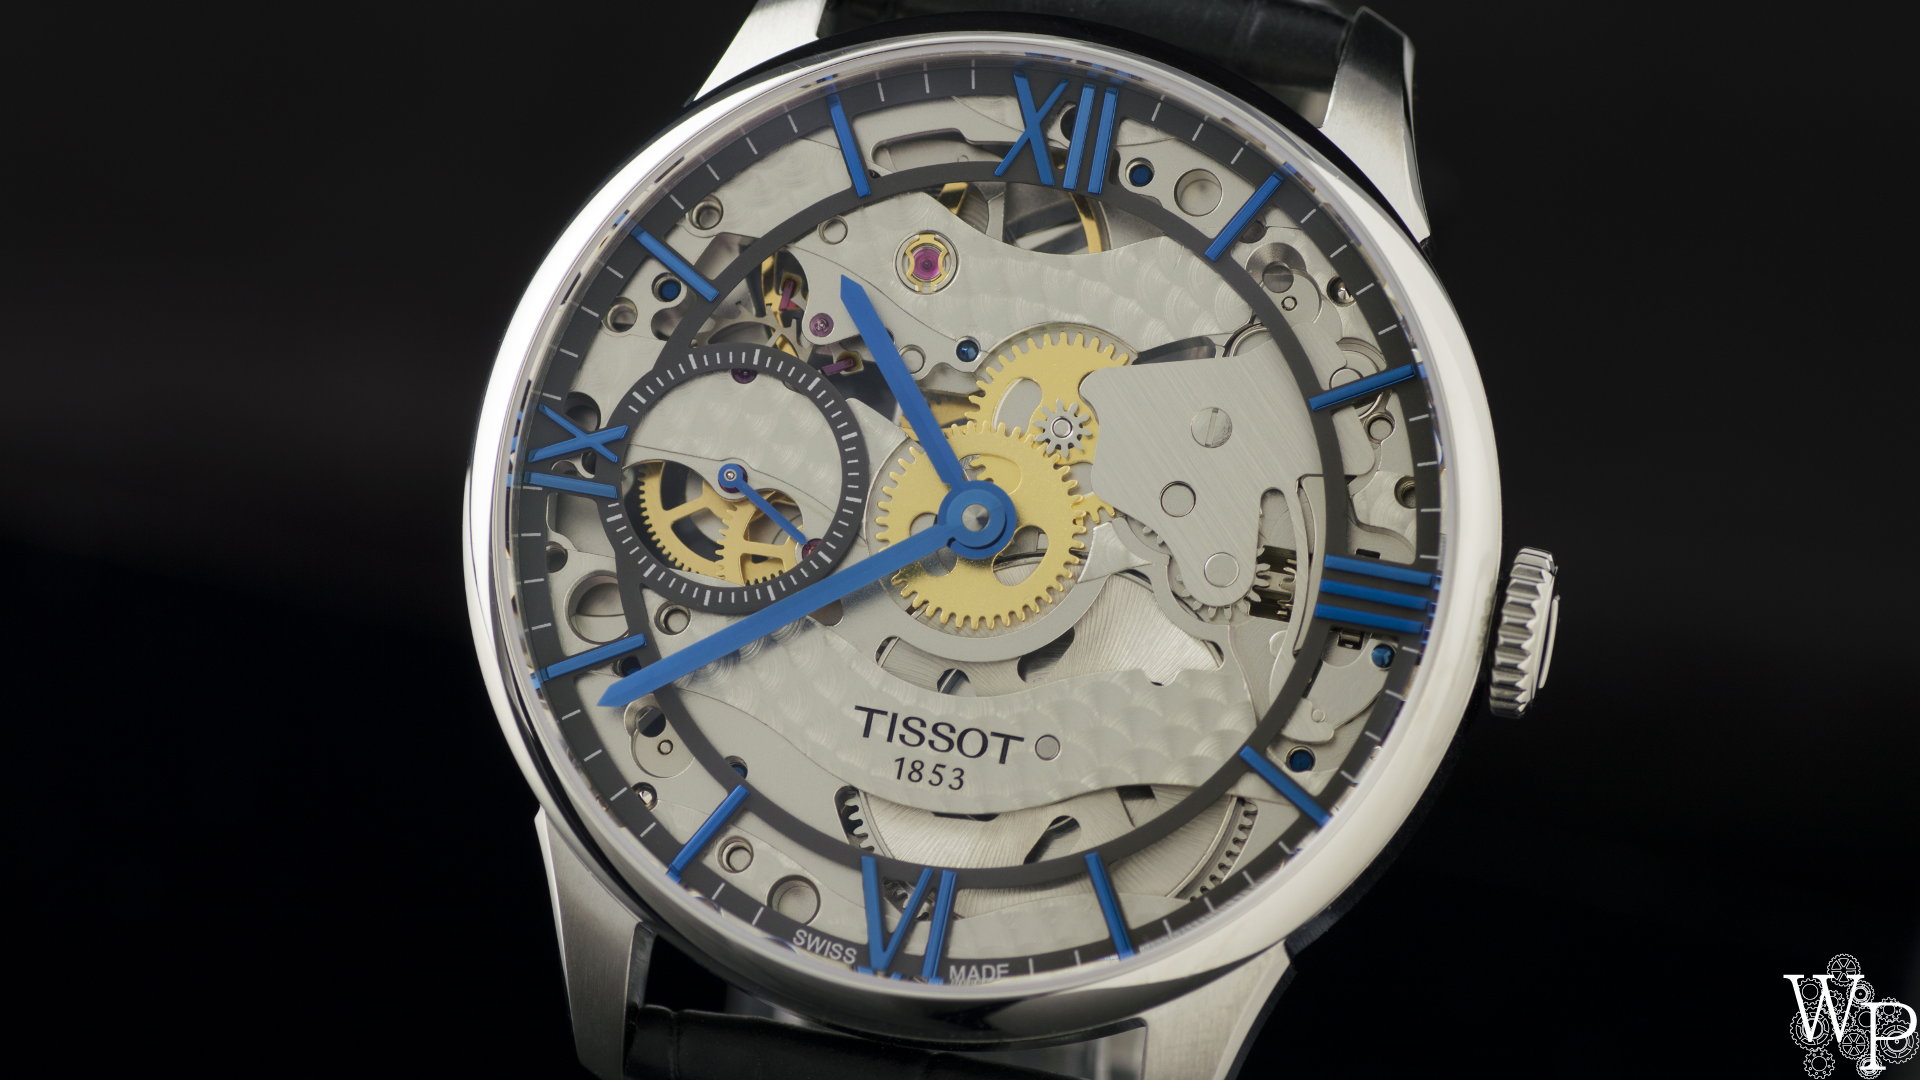 In the above image, the hour markers and hour/minute hands appear to be a solid shade of blue. While not a bad looking image, once you view the dial from other perspectives it becomes clear that this image mutes the dial somewhat.
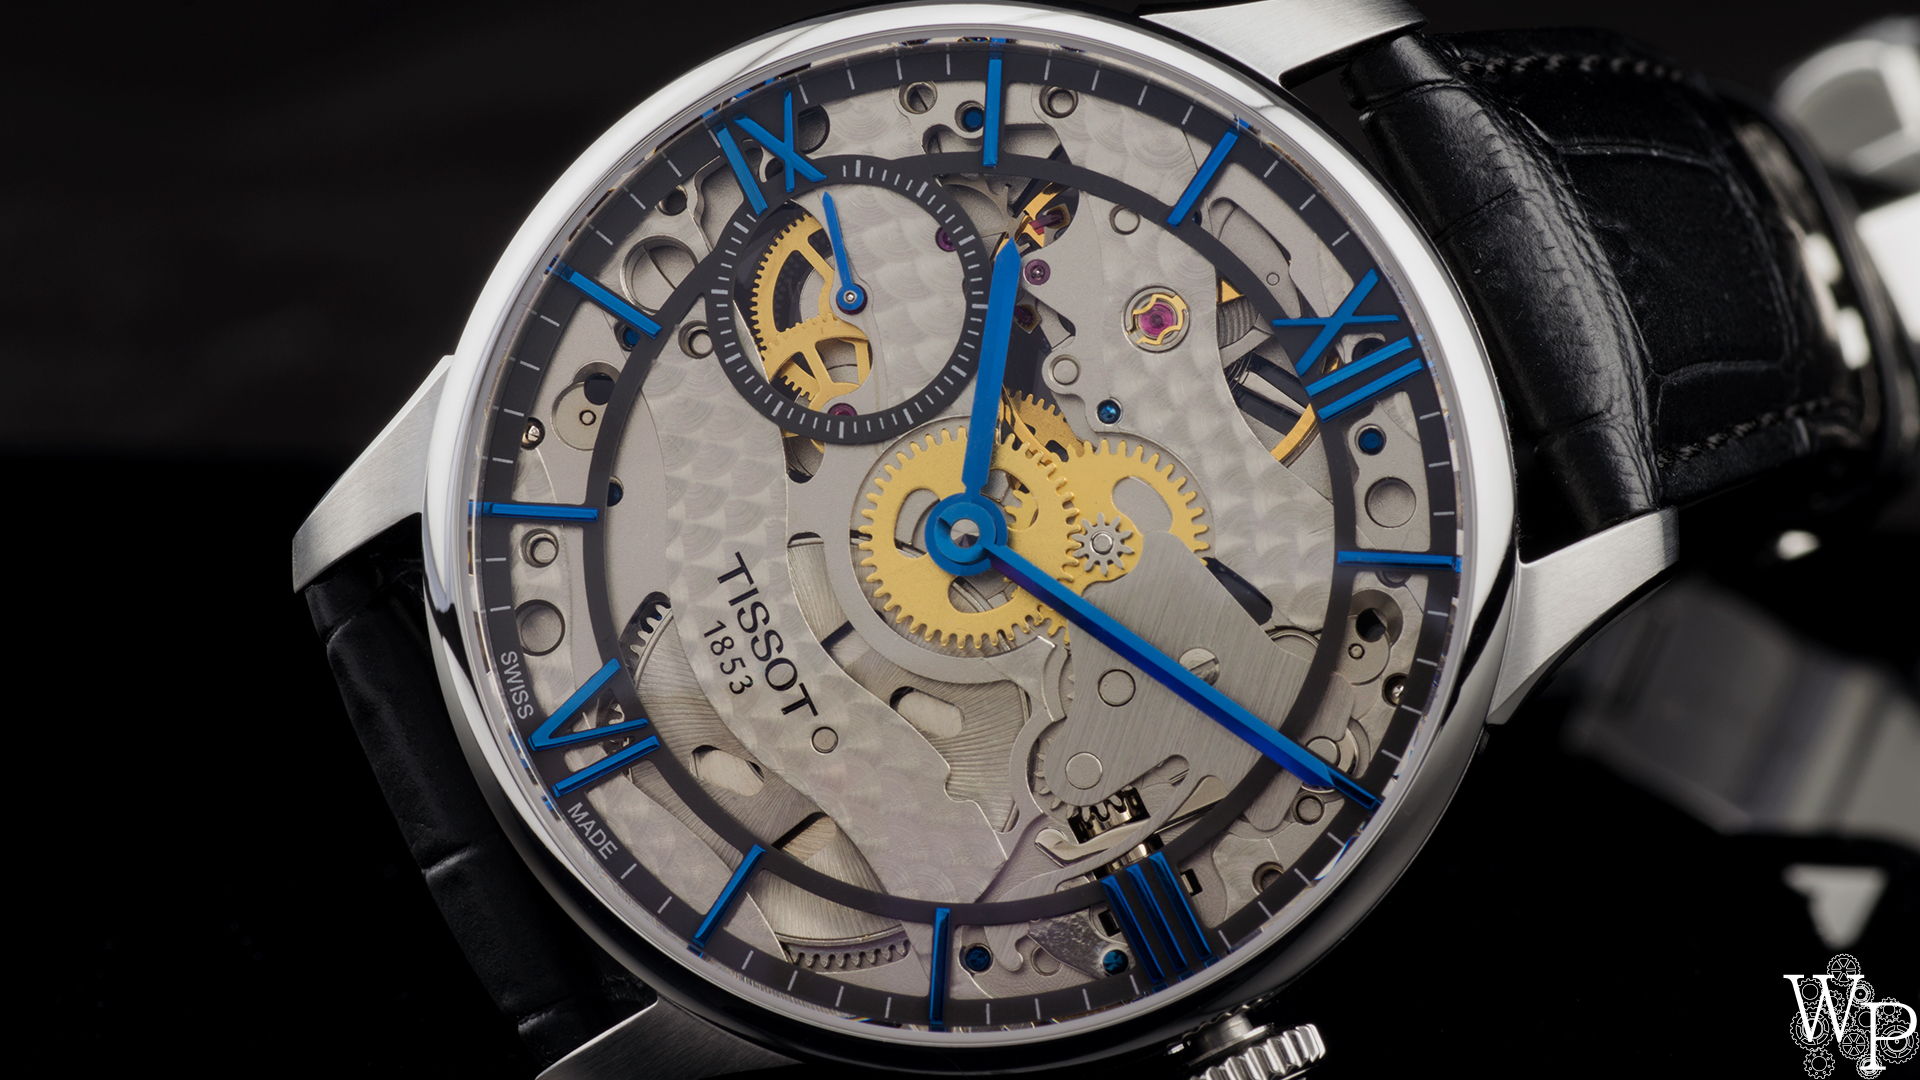 The angle of the shot changes how light interacts with the hands/indices. Compared to the above image, the hands have more depth- you can see the difference in colours, and the hands/indices feel more alive as a result.
Get Creative to Get That “Wow” Factor
When I capture an image that makes my wife stop and go “woah”, I feel very satisfied. A great image tells a story and inspires a sense of wonder. A skeleton watch has a million ways that it could be wonderful- you just have to look for them.
Explore your creative liberties and experiment with different angles/perspectives. Show the sides of the dial or movement that you wouldn’t otherwise appreciate.
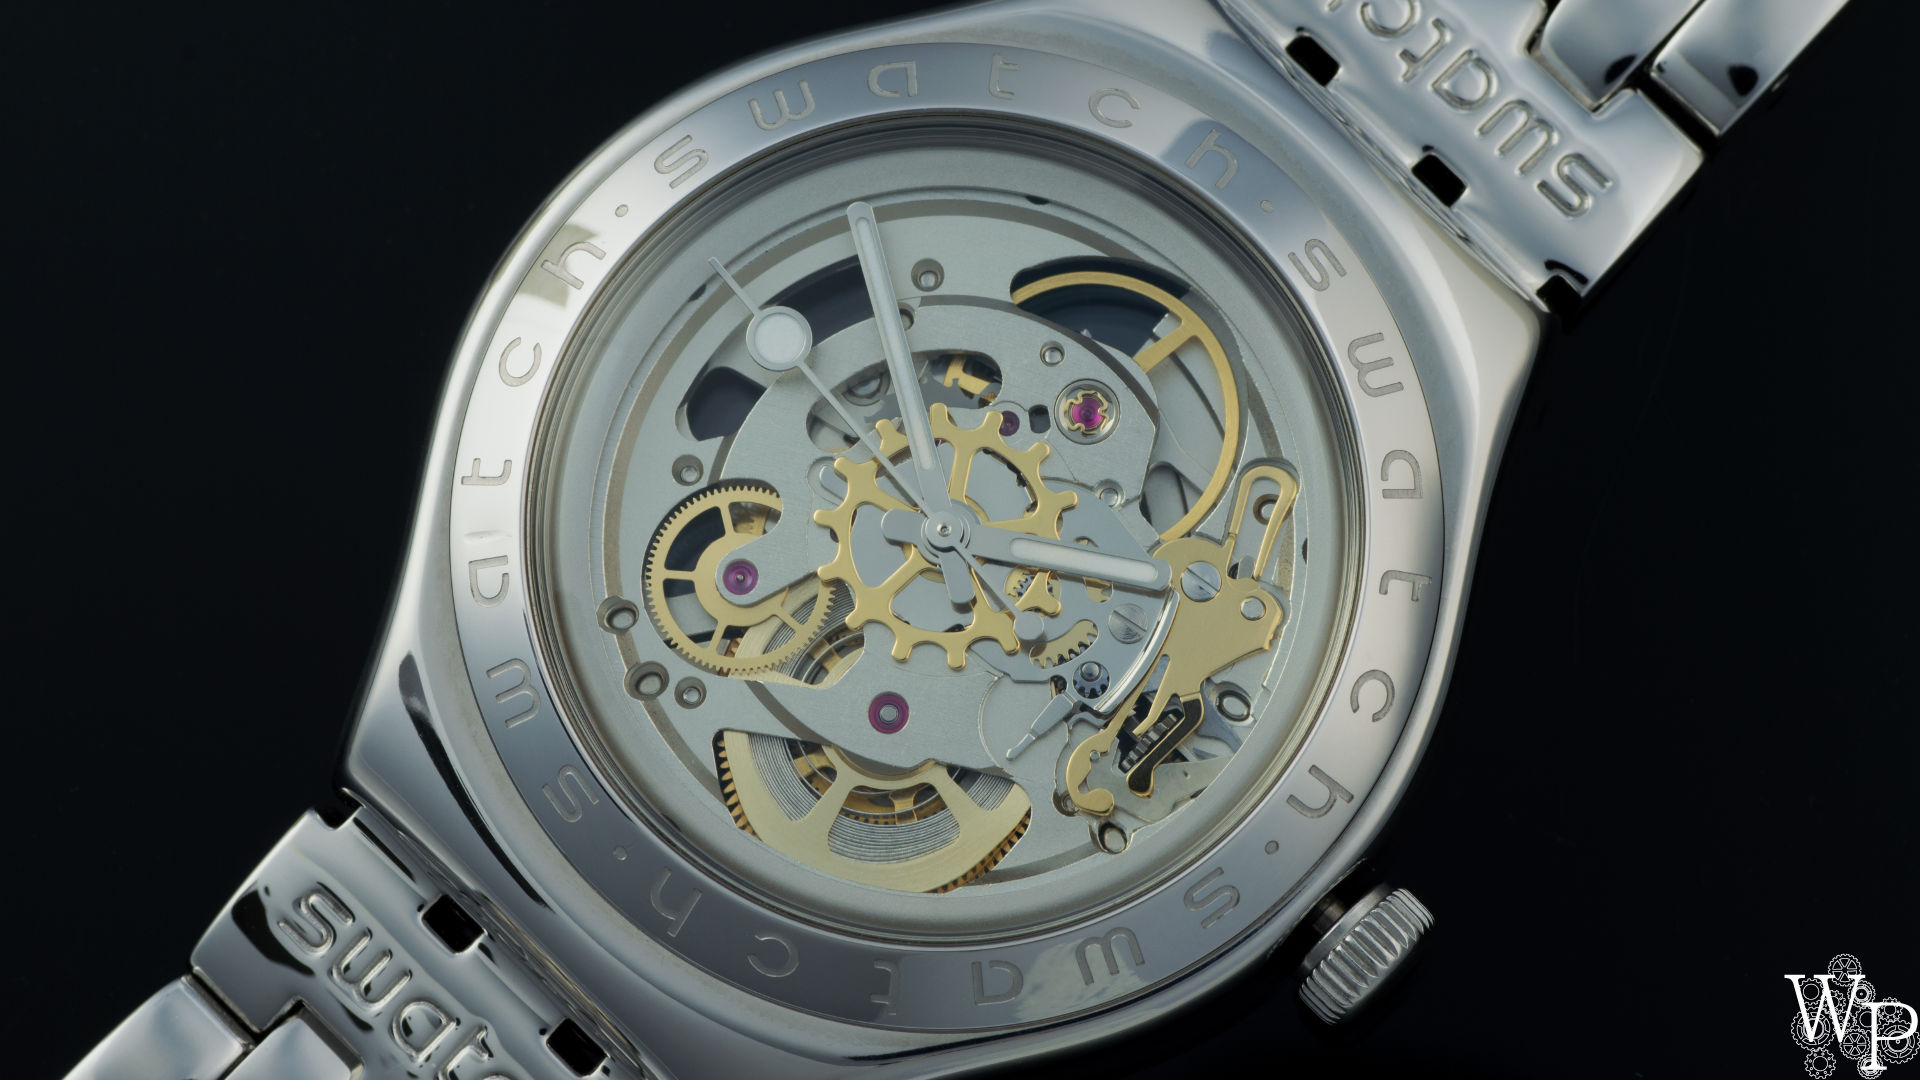
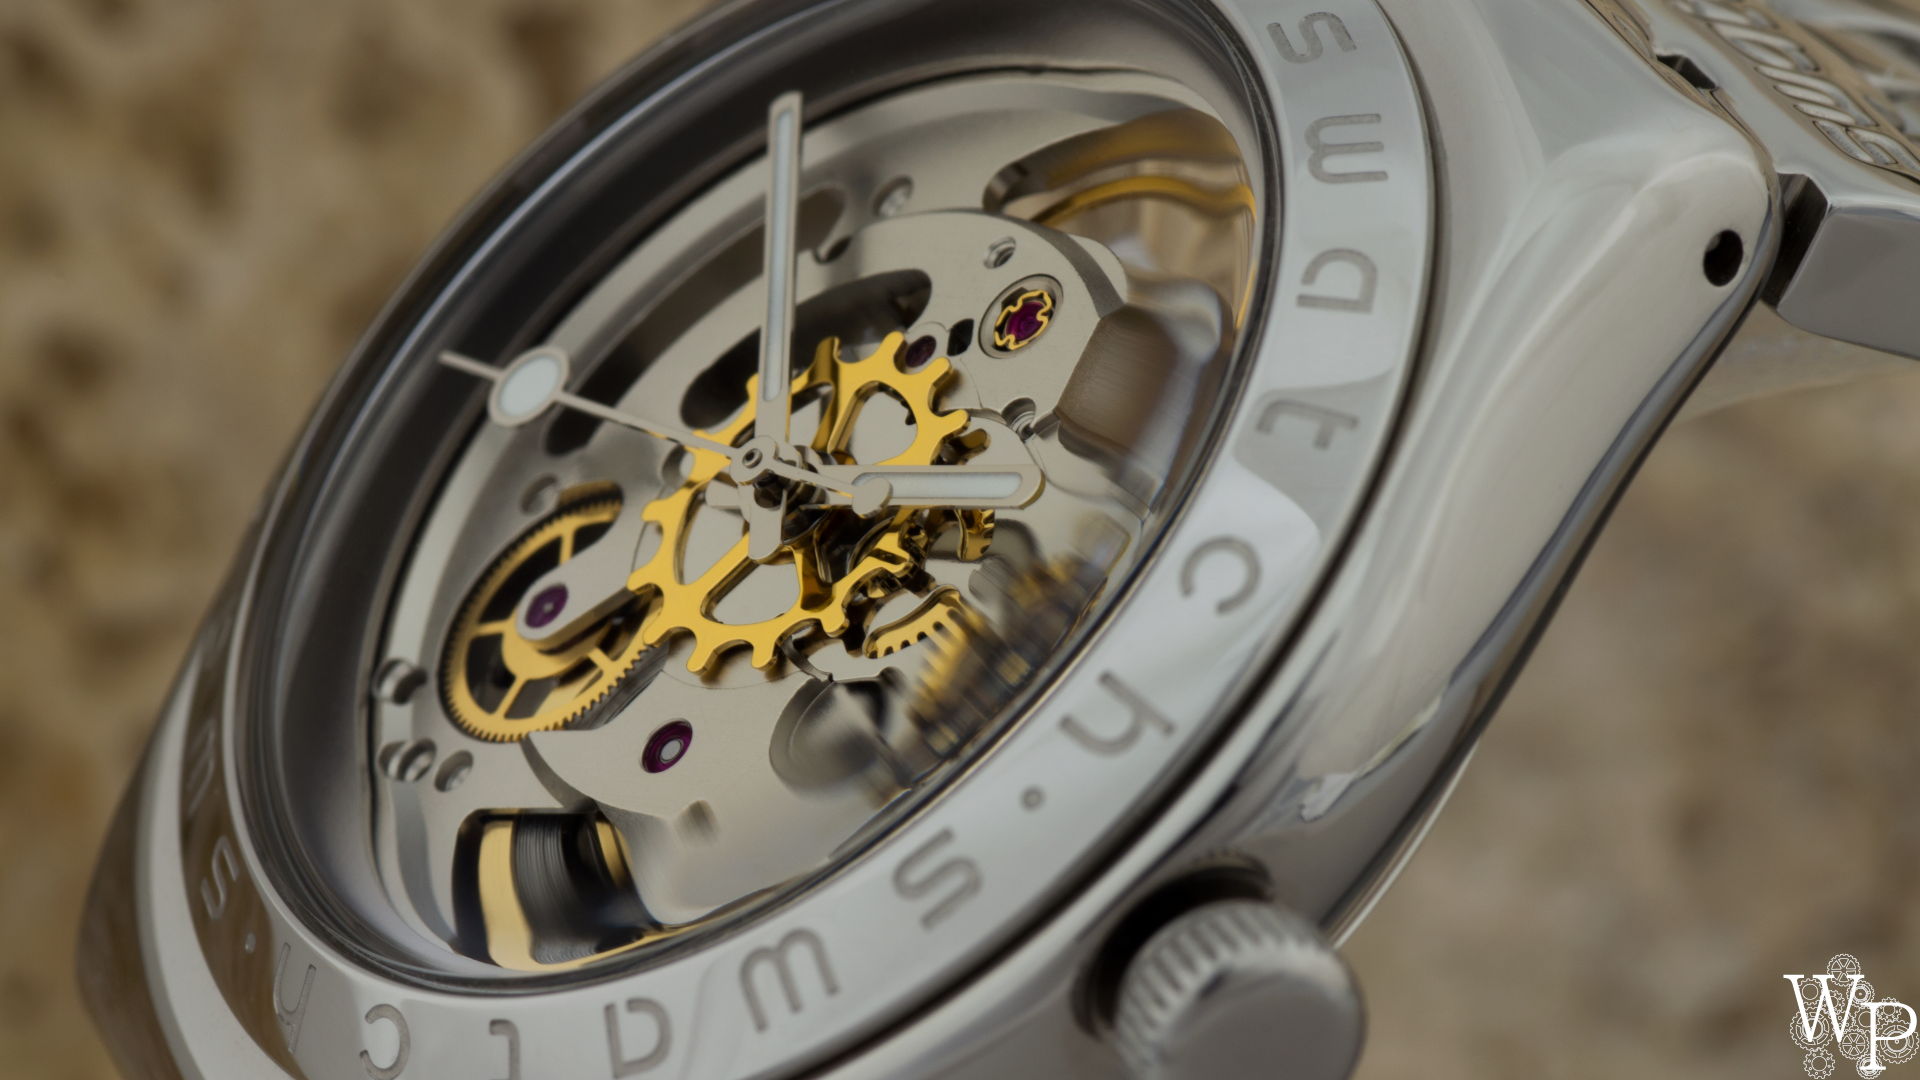 What I enjoy about this shot of the Swatch Irony Body & Soul YAS100G is how the hands seem to tower over the dial… but the dial is still deep and interesting.
Of course, it’s always fun just to pump the contrast and blow the cool bits up.
When you find a pleasing angle, try different variations of it: new backgrounds, different types of lighting, and other elements that make up a scene. I enjoy using reflective acrylic to direct light and creation reflections.
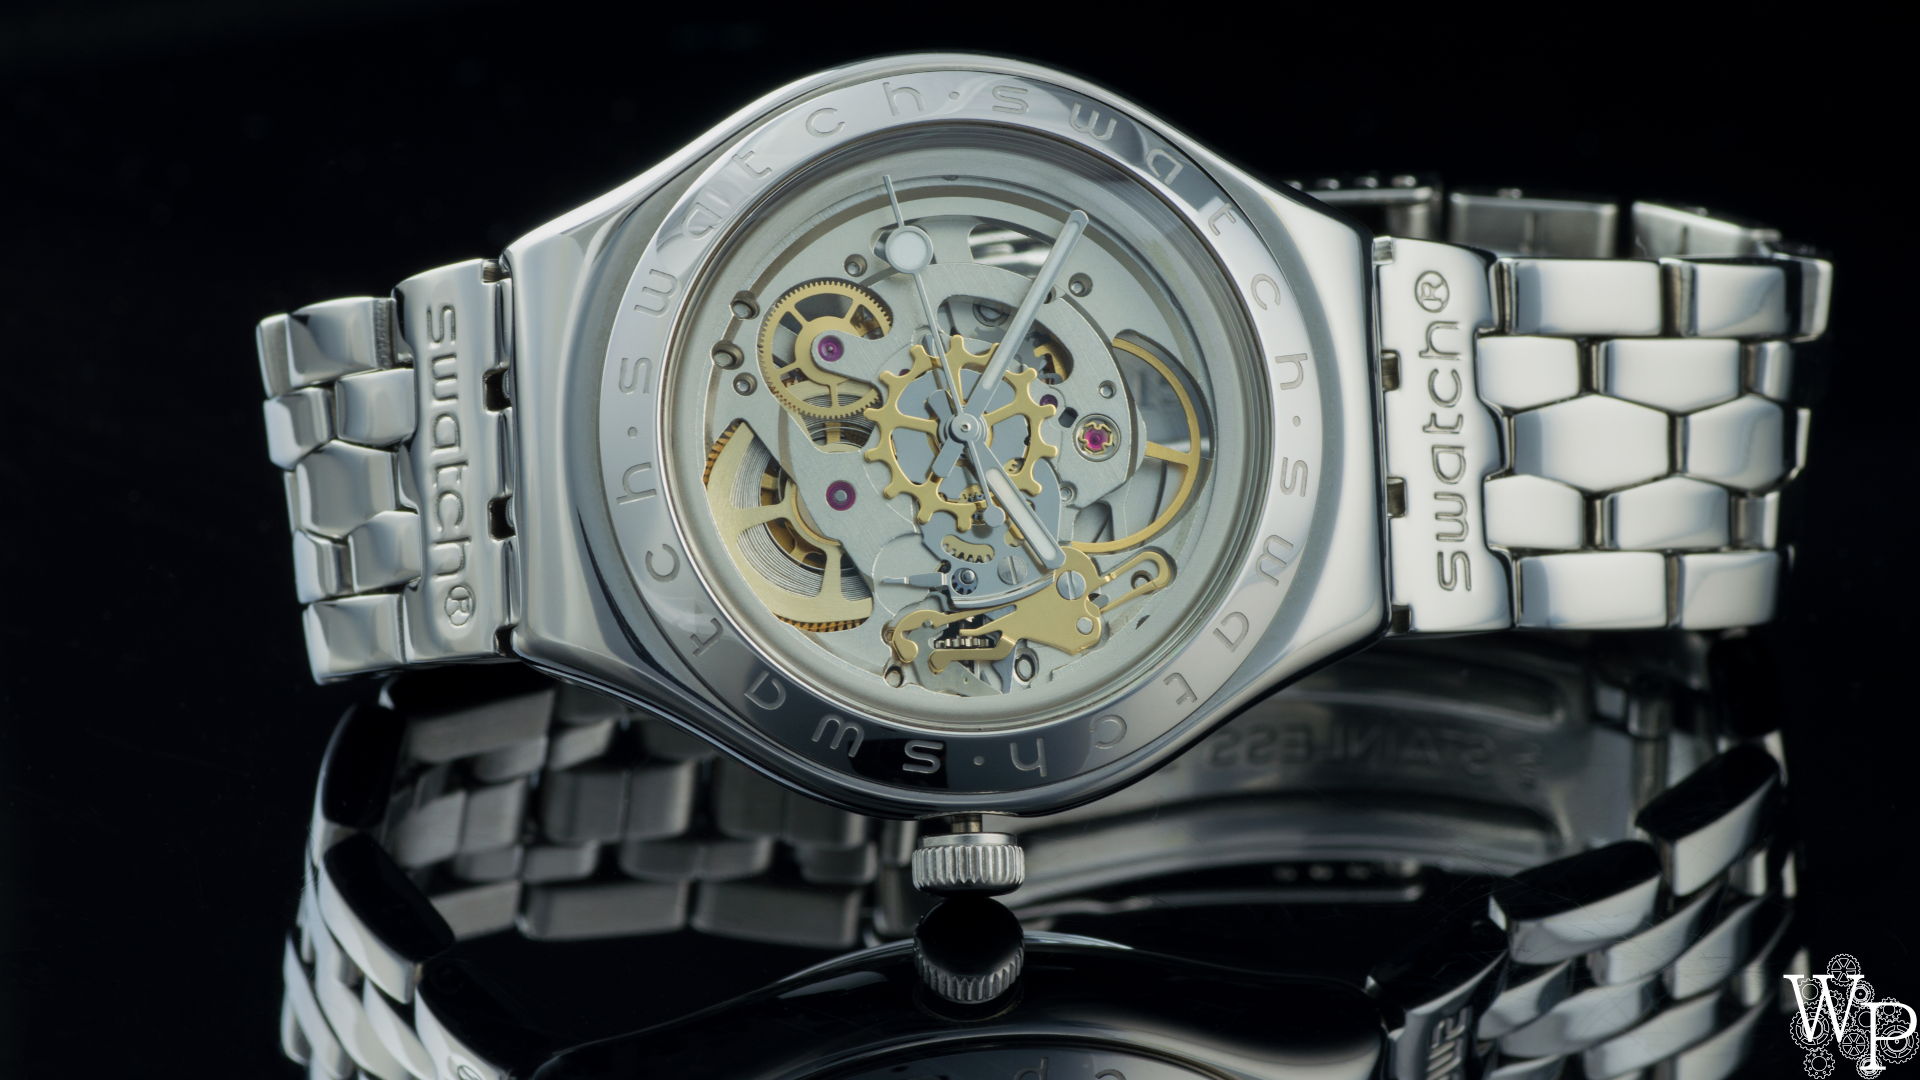 Often a watch is interesting enough that you don’t need a creative angle to get a creative image.

